
Cotton or wood? A quarter-inch trim or something shorter? The wick is a small detail that shapes the whole candle experience. This candle wick guide explains the differences, how to care for the candle on your table, and what makers should look for when testing a handmade concrete candle.
What does a candle wick actually do?
A wick draws melted wax toward the flame, where that fuel vaporizes and burns. Its size and construction affect the flame, the pool of liquid wax, and how quickly the candle uses its fuel. Wick choice also influences soot and the way fragrance is released.
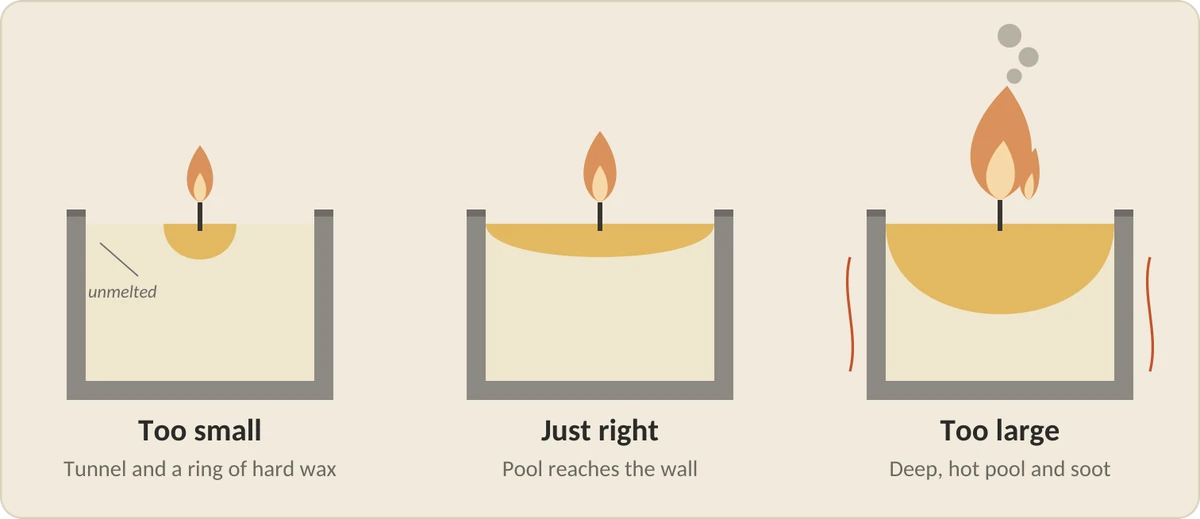
An undersized wick can leave a persistent tunnel. An oversized wick can produce an excessive flame, soot, and too much heat. A wider melt pool alone does not prove a candle is well wicked: the flame and vessel must behave appropriately throughout its usable life.
Cotton vs. wood wicks: which should you choose?
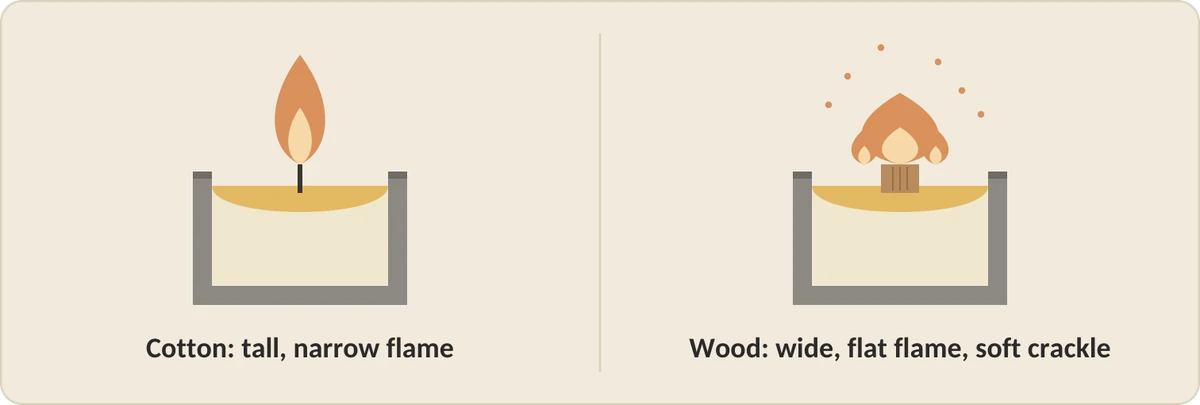
Cotton wicks offer a familiar candle experience. Wood wicks create a different flame shape and can add a soft crackling sound. Neither is automatically better, cleaner, or stronger scented; the complete candle recipe and its testing matter more than the material alone.
Choose cotton if you enjoy a traditional wick. Choose wood if a gentle crackle is part of the atmosphere you want. Crackle varies with the wick and recipe, so it is not a promise of fireplace-level sound.
| Feature | Cotton wick | Wood wick |
|---|---|---|
| Construction | Usually braided fibers; construction varies by wick series | A thin strip or layered strips of wood |
| Experience | Familiar flame and straightforward trimming | Broad flame shape with a possible soft crackle |
| Typical starting trim | About 1/4 inch, unless the label says otherwise | Often about 1/8 inch; follow the candle label |
| Care | Remove loose trimmings and any carbon buildup before lighting | Remove loose char when cool; avoid cutting below the recommended height |
| Best choice | The style you enjoy in a properly tested candle | The style you enjoy in a properly tested candle |
How to trim cotton and wood candle wicks
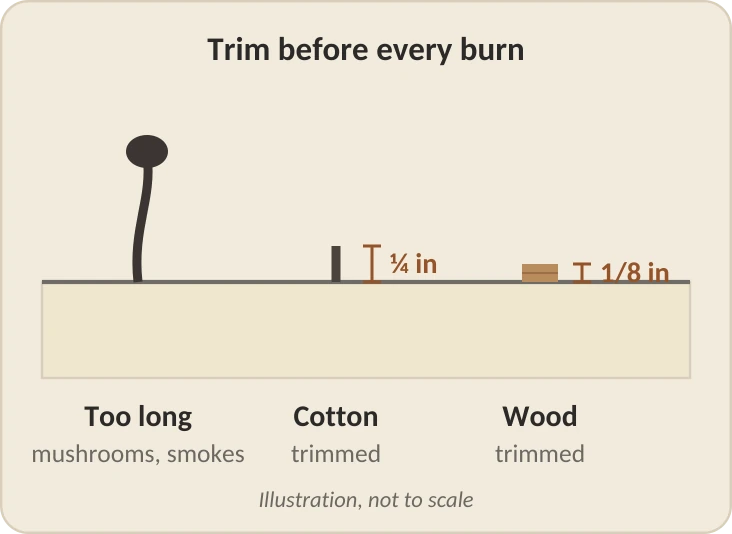
Let the candle cool completely before trimming. For cotton, about 1/4 inch is a common starting point. For wood, about 1/8 inch is common, but the candle’s own instructions take priority because wood wick designs differ. Remove loose char and debris from the wax before lighting.
A wick that is too long may smoke or develop a large flame. Cutting too short can make lighting difficult or cause the flame to drown. For wood wicks, light across the exposed top edge. If it repeatedly goes out, stop and contact the maker rather than repeatedly relighting a struggling candle.
The first burn: watch the melt pool without chasing it
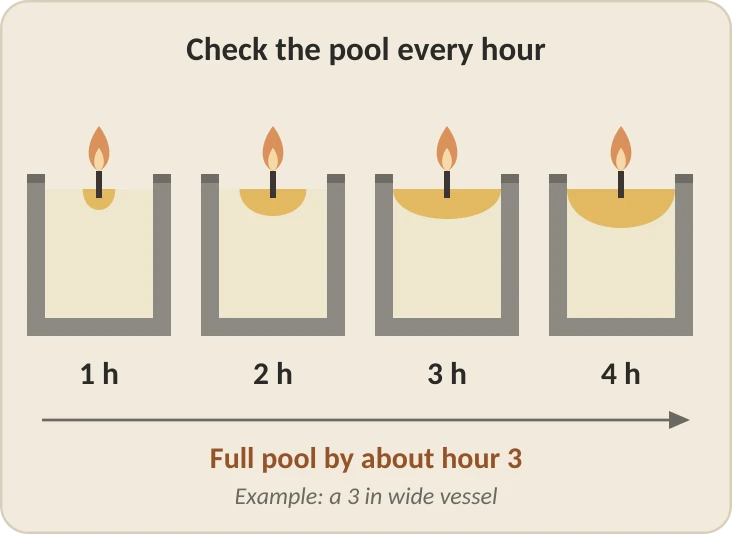
The melt pool is the liquid wax around the flame. Give a first burn enough time for that pool to develop, following the candle label. About one hour per inch of vessel width is a rough planning guide, not a requirement to keep burning until every edge melts.
Some wax can remain along the sides during early burns and melt later. Never exceed the labeled burn time to force an edge-to-edge pool. In general, keep sessions to no more than four hours, or the shorter limit on the label, and let the candle cool completely before relighting.
For more about the first light, read our first-burn guide.
Read: The first burn is everything
Candle wick troubleshooting: tunneling, soot and weak flames
Start with the label, a correct trim, and a location away from drafts. These symptoms can have several causes. Customers should contact the maker if a problem persists; wick selection and sizing guidance is for makers pouring new test candles, not for modifying a purchased candle.
| What you notice | Possible cause | What to do |
|---|---|---|
| A persistent tunnel | Short burns or an unsuitable wick for the recipe | Follow labeled burn sessions; contact the maker if it continues |
| A tall, unstable flame or black smoke | Drafts, a long wick, or an oversized wick | Extinguish, let cool, trim as directed, and move away from drafts |
| A carbon mushroom | Carbon buildup associated with wick and recipe behavior | Remove buildup when cool; makers should retest the combination |
| A weak flame that goes out | Too-short trim, excess wax around the wick, or recipe mismatch | Stop repeated relighting and ask the maker for help |
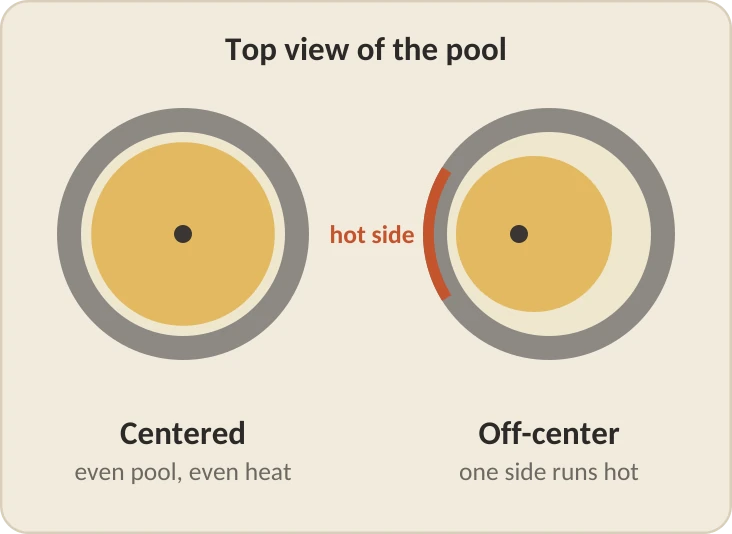
| One side becomes unusually hot | A leaning wick, draft, or uneven heat | Extinguish and discontinue use if it recurs |
| Weak fragrance | Fragrance, wax, cure, room size, or wick performance | Do not burn longer to intensify scent; ask the maker for advice |
For makers: how to choose and test a wick size
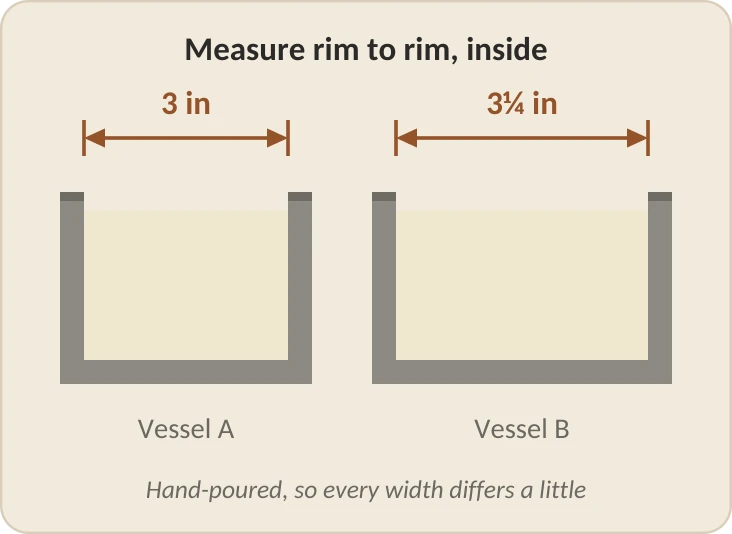
Measure the vessel’s inside diameter and note its shape, depth, and any variation in wall thickness. Handmade concrete vessels can differ, so do not assume that a wick used in a similarly sized glass jar will behave identically. The vessel and sealer also need to be suitable for candle use; wick selection cannot make an unsuitable container safe.
Use the wick supplier’s chart for your wax and vessel size as a starting point. Compare nearby sizes in that wick series. Wax type, fragrance oil, fragrance percentage, dye, and wick construction can all change the result. More fragrance does not automatically mean a larger wick will solve the problem.
Let test candles cure according to the wax supplier’s instructions. Keep the recipe consistent while changing one variable at a time. Test on a heat-resistant surface away from drafts and combustibles, supervising the flame throughout every session.
Record the vessel measurements, wax, fragrance percentage, dye, wick series and size, cure time, and session length. At regular intervals, record flame behavior, melt-pool width and depth, soot, and measured vessel temperatures against appropriate supplier guidance and applicable testing criteria.
Continue controlled burn-and-cool cycles through the candle’s usable life, stopping at the recommended remaining wax level. Two successful burns are not enough to validate a wick: heat behavior can change as the flame moves lower. Retest when the recipe, wick, vessel, or sealer changes.
How to make concrete candles and seal jars
Everyday care for your concrete candle
Keep the candle in sight on a stable, heat-resistant surface, away from children, pets, drafts, and anything flammable. Keep the wax free of matches, wick clippings, and other debris. Never move a burning candle or add water.
Extinguish with a candle snuffer. Do not assume a decorative concrete lid is designed to extinguish a flame. Let the candle cool before handling it, and stop using it when about 1/2 inch of wax remains, or sooner if its label requires. Stop immediately if the vessel cracks or the flame becomes abnormal.
When the candle is finished, the cleaned vessel can become a catchall or decorative piece. Use a suitable liner if repurposing it as a planter.
Frequently asked questions about candle wicks
Is a wood wick better than cotton? It depends on the experience you enjoy. A wood wick can add a soft crackle; cotton offers a familiar burn. Both need to be matched to the wax, fragrance, and vessel.
How often should I trim a candle wick? Before each burn, once the candle is cool. Use the length on the candle label and remove loose trimmings before relighting.
Does tunneling always mean the wick is too small? No. Short burn sessions can contribute, and some early wax hang-up can resolve later. Persistent tunneling under the labeled care routine is a reason to contact the maker.
Should a candle melt all the way across on its first burn? Not necessarily. Follow its labeled session limit and judge the candle over repeated burns. Do not extend a session just to melt the edges.
Can I change the wick in a candle I bought? Do not add, replace, or double up wicks to change its performance. Ask the maker for help with a candle that is not burning correctly.
Choose your next handmade candle in Evansville
At SJS Homemade, your candle starts with the actual one-of-one concrete vessel you choose. Pick a fragrance and your preferred wick in the candle builder, then Scott pours your candle after your order. It is a personal way to bring handmade candlelight into your home or give a gift with a vessel worth keeping.
Browse the current options, or call Scott at (812) 329-0371 if you have a question about choosing or caring for your candle.
Build your handmade candle · Local delivery details · Call Scott
PASS A LITTLE WARMTH ALONG